Introduction,
Many people often ask me how I’ve built an electric-skateboard which I ride on the streets. To be honest, I knew nothing about skateboarding. What’s even worse is that, it’s pretty hard to find skateboard culture in India and parts for the same. So here is my journey of building electric skateboard, so without any further ado let’s get started!
Special Thanks to Soldron for Sponsoring this entire project. They make premium quantity Soldering iron. I personally have been using 878D solder station for last 2 years. Never had any complaints try them yourself, check them out at -> https://soldermall.com
Selection of right board,
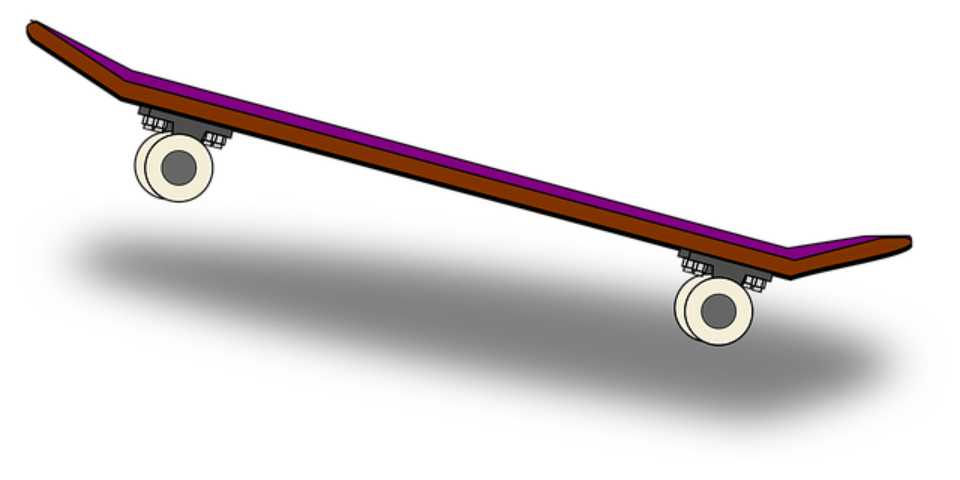
First challenge was to find a skateboard which I can later modify to make it electric. I could have easily built one by myself but I Didn’t have the right tools for that. Anyway when it comes to selecting skateboards there are quite a few choices like a penny board, speeding board, Longboard etc. Best choice here was the Longboard of course because they are usually wider and longer in shape. In addition to having softer wheels, they are also more reliable and easier to ride because of a more balanced structure, making them a perfect fit for the beginners and we will have a lot of room to add electronics on the board later.
So here starts the fun part, you want to make an electric skateboard Huh? Welcome to the world full of fun, patience, and options. Yes! options. There are tons of choices out there, whether it be motors, ESCs (Speed controller), or Batteries. But how do you narrow down? what you want or don’t want? I’ll help you to the best possible extent. First off, let’s understand all different parts you will need for building electric Skateboard.
Selection of Parts,
Part List,
- Sensored BLDC Motor (This one is better than mine)
- SensorLess BLDC Motor (Cheaper)
- ESC
- Drive Train
- Motor Mount kit
- Batteries
- Battery case
- Tools and Supplies:
- Soldering Iron
- Solder wire
- Tool Box
- Metal Files
- Drill
- Drill Bits
- Plyers
Motor:
There are mainly two types of DC motors:
- Brushed DC Motor
- Brushless DC Motor (BLDC)
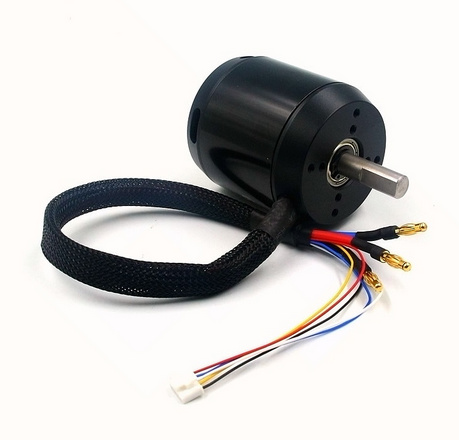
What you are looking for is a brushless (BLDC) outrunner motor with a kv rating from 170 to 300 and Power between 1500 to 3000 Watts. So, think of your kv rating as how much torque your board will have, the lower the kv the higher the torque. Motor is rated for 280kv and 2500watts. That is pretty beefy and is more than enough for a person weighing 100kg.
ESC:
ESC is abbreviation for Electronic Speed Controller, since BLDC are a bit advanced and uses 3 phases to control speed hence you need a speed controller. The ESC is the ‘brain’ of the build. It’s the link between your batteries and motor. It also connects to the receiver that goes to your remote control. The ESC gets the ‘commands’ (PWM Signal) from the receiver that tells it how much the remote’s throttle is pushed. It then controls the amount of energy that passes from the battery to the motor, hence controlling the motor’s speed.
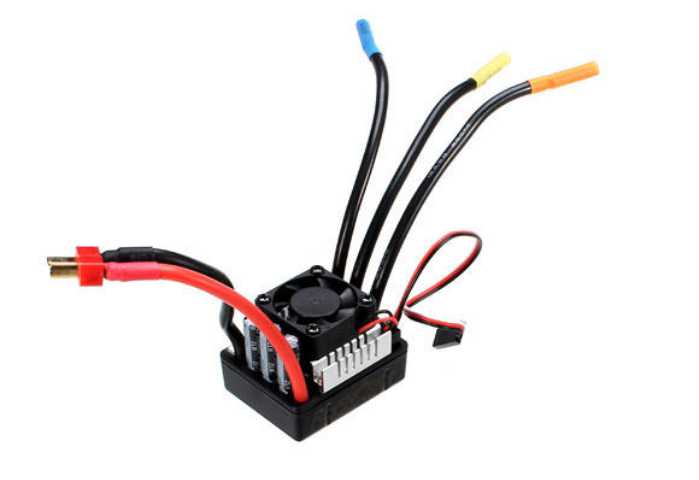
The one I’m using is rated for 24Volts and 120Ampers, so if you do math i.e.
Power= Voltage * Current, then 24*120 = 2880 Watts
and motor is rated for 2500 Watts, so we have some head room here.
Note: ESC is the one part of your electric skateboard build that you do NOT want to cheap out on. Cheaper speed controller can catch fire. Also if you want you can use a VESC which is advance version of ESC.
Battery(s):
The battery determines how far you can go. You want a battery that is compatible with your motor. My battery is 6S 3P Li-ion which means, I have 6 Li-ion cells in series with 3 parallel line.
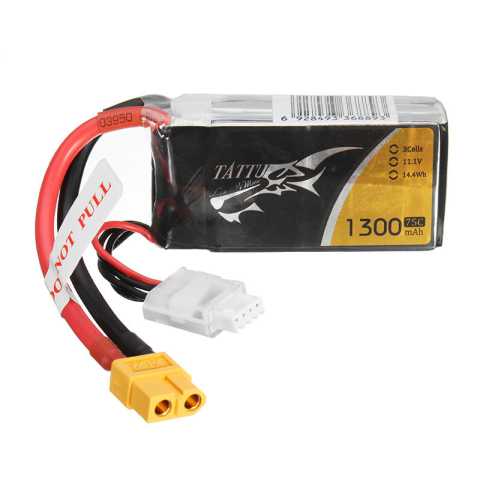
That means the voltage of my battery is (6×4.2) 25.2Volts and each cell is capable of 25 Amper (In-Burst) and we have 3 in parallel so 25*3,which is 75 A.
Therefore,
Power = 25.2 Volt * 75 Amper = 1890 Watts.
Now you might wonder motor is rated for 2500Watts but our batteries can only supply 1890Watts, So how will it work? Well from my testing I found with a load of 80Kg the Motor was only drawing around 1200Watts. So we are good to go. Also each cell is 2600Mah and since we have 3 cells in parallel so total capacity is 2600*3 which is 7800mAh.
Pulley and Belt:
So your wheels, motor pulley, wheel pulley, and belt all have to fit in together into what is referred to as a drive train. The ratio of the wheel pulley to motor pulley is called the “gear reduction ratio”. You want that to be around 2.5, but can go as low as 1.5 or as high as 3. Generally a lower reduction ratio is better but low speed. I used an 70mm wheel Pulley which comes in kit with a gear ratio of 3 for high speeds.
Motor Mount:
For my built I decided to make my own motor mount because one I ordered was very delicate. For designing I used Auto desk Fusion 360 and in the design I decided to go with the clamping technique for mounting it to the trucks of longboard. I designed my final version, and with some testing and 3D printing. Figured out how much slide I could get between the motor and the truck axle to tighten the belt in future.
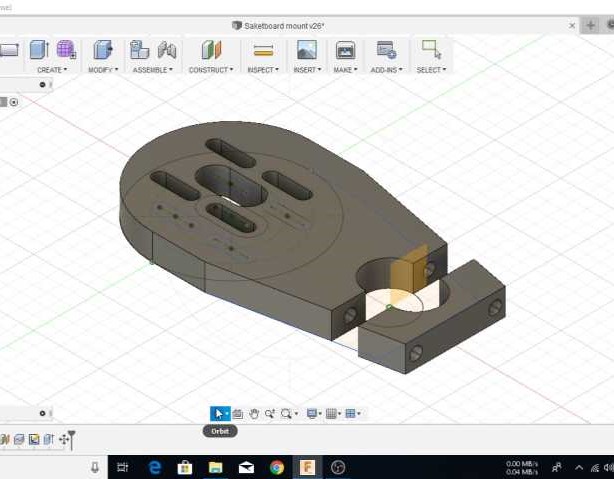
Once design was ready I took it to nearby CNC workshop and got it manufactured using CNC. The material I used was Aluminium 6061-T6 because it is easy to work with and has High strength characteristics.
Now we know all the parts needed for the built so let’s start the Building Process!
The Built Process:
Firstly I started by removing rear right wheel so we can attach our mount and motor. The Trucks of skateboard had slight curve to it, I used a metal file to get rid of it such that motor mount fits perfectly on tucks of the skateboard. After installing the motor mount I installed the motor using Machine Screws.
Once that was done it was time to add pulley to the wheel. So we can transfer the rotational energy from motor to wheel. It’s really simple process just place the bigger pulley at exactly center of wheel and mark the holes where we need to drill through wheel. After Drilling use some machine screws to attach the pulley to the wheel don’t forget to use thread lock or use Self Locking Nut with machine screws.


Now we will attach the smaller pulley on motor shaft and put the belt along with Wheel and make sure it’s properly aligned. Such that all three combined form our drive train. After finishing that we can attach our ESC to the motor. Just connect three wire from ESC to the three wires of Motor now connect your battery pack to the ESC and finally it’s time to connect ESC to Radio Receiver. I decided to build my own radio controller using Arduino and nRF24L01 Module but you can just buy one use it.
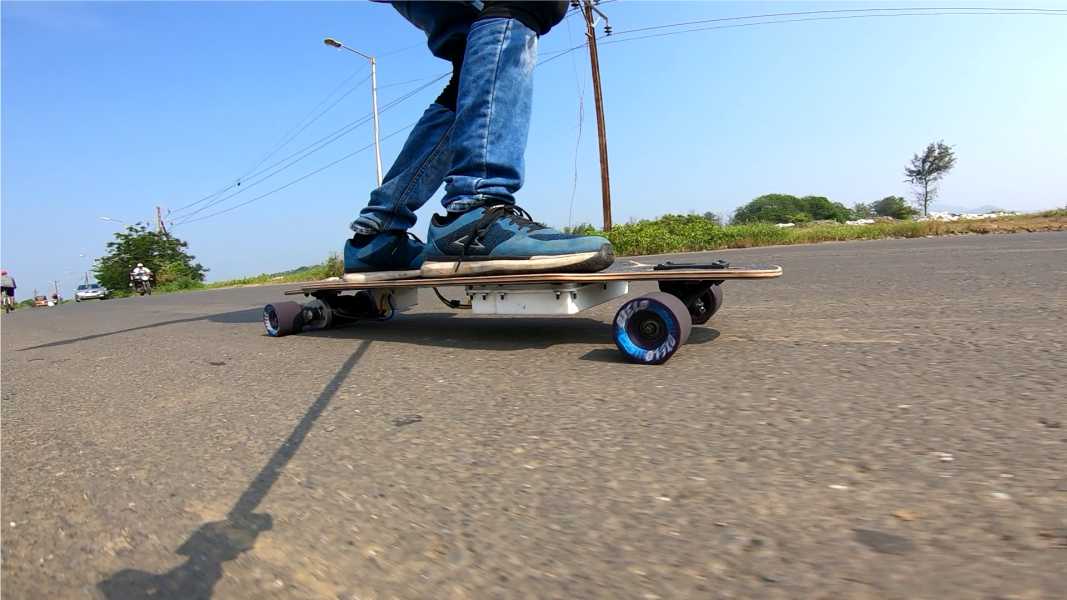
After attaching the receiver, test if motor is spinning in the right direction if not, just swap any two wires from motor and motor will spin in other direction. Now all you have to do is add all the electronics and Batteries into a case, I have a 3D printer so I made a custom case but you can use some plastic boxes and mount it underneath your longboard and you are ready to roll on streets!
Circuit Diagrams & Code of DIY controller.
Alright, Now for the numbers!
- Weight: 7.2kg
- Clearance: 7.5cm
- Top Speed: 35km/hr (Possible to reach 48km/hr but highly unstable to ride)
- Cruising speed: 25Km/hr
- Range: 25 Kilometres
- Power: 1890 Watts (Capable of 2500Watts)
- Batteries: 6S 3P Li-ion (25.2V 7800mAh)
Remember, Always skate within your ability and no matter what you ride, always wear a helmet and proper safety gear.