Introduction,
I needed a way to sense vibration for one of my upcoming project. It can be easily done by a Spring vibration sensor but instead of spending Few $$ and shipping and waiting for it to come in the mail, I decided to make one myself. So in this tutorial I’ll show you how you can make a Spring vibration sensor so Lets gets started!
Supplies:
Materials:
Tools:
Working Principle


Before we get started with making our sensor let’s understand how it works.
The working principle of vibration sensor is very simple. It has one resistor whose value is 10k ohm in our case and the spring surrounding it. One end of the sensor is one lead of the resistor and another end of the sensor is the spring, 2nd lead of the resistor is in the air. Which makes it a Normally open switch.
If you now connect the sensor to 5V and the digital pin of Arduino. When vibration is experienced, spring will vibrate and spring will touch the resistor resulting in we get 5V at the input of our Arduino. That’s the working principle of vibration sensor which is basically a simple switch!
That’s how the sensor works, Now let’s see how to make one.
Step 1: Making Spring


To sensor you need naked copper wire or you can use enameled copper wire and make it naked, if you don’t have one you can even use single stand wire it will work just remove the insulation coating. Now measure about 25cm of copper wire. After which if you are using enameled copper wire we will use some sandpaper and a plyer to remove the enameled coating from copper wire.
Now using a bolt with 3mm diameter also called M3 Bolt. Make spring of about 3cm in length.
Step 2: Adding Resistor & Shrink Tube

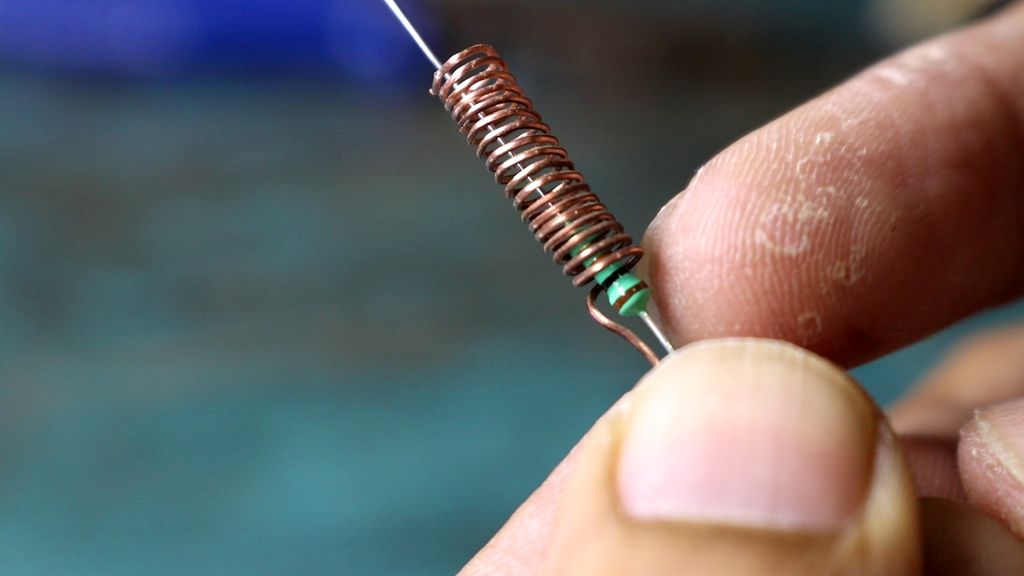
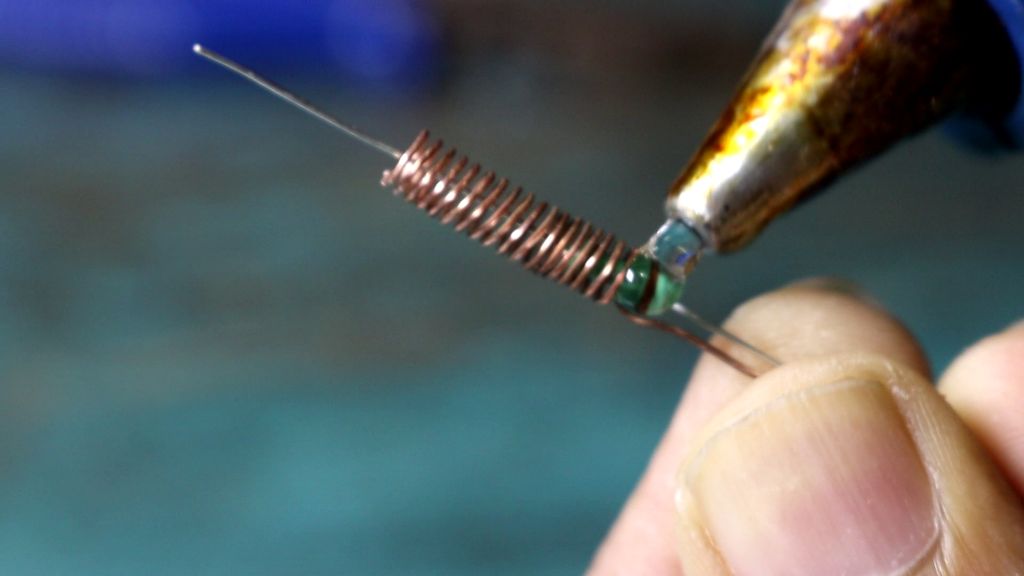
After making spring you can chop off the one end of spring. Now take a 10k ohm resistor and place it inside the spring. Make sure it doesn’t touch the spring. After which we will use some hot glue or a two-component adhesive to fix the Resistor in its place.


Now we will use some heat shrinking tube to cover the sensor.
Step 3: Test the Sensor!


To test the sensor, solder it to 5V and Digital pin 2 of Arduino. After which I wrote few lines of simple code which senses every time sensor gets vibrated .
If you face a sensor getting trigger quite often or not getting trigger at all, try adjusting the resistor position and use less heat shrink tube or not at all.