Introduction
A lithium-ion battery or Li-ion battery is a type of rechargeable battery.
We commonly use Li-ion battery for portable electronics. Therefore, they are getting popular in military and aerospace industries. Li-ion batteries, however, are not enough when we use them as a single unit. Hence, we should connect them in series or parallel configuration. Doing that, we can use the battery pack to make some bigger projects in electronics, which require higher voltage and current.
Everything we need,
Materials:
Tools:
Step 1: Obtain the Li-ion batteries

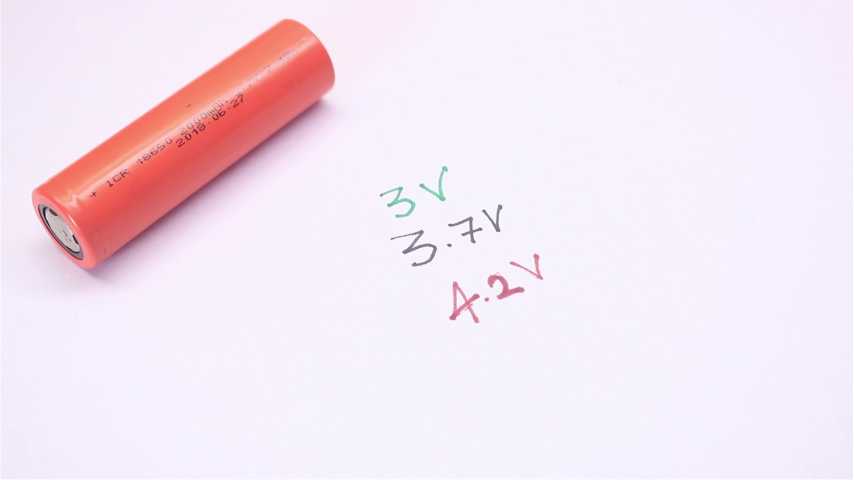
You can recover the Li-ion batteries from laptops. You can buy them in the stores as well. The batteries show the voltage from 3 to 4.2 V and capacity of 2000 mAh.
Step 2: Connection for the battery pack


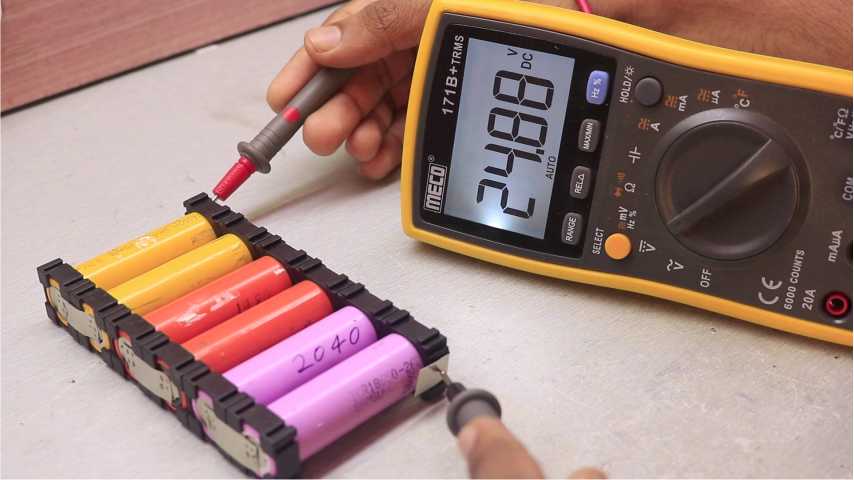
Then, we need to connect the batteries in 6S1P configuration. 6S1P means we connect 6 cells in series and 1 cell in parallel. Due the this configuration, we can get 4.2*6= 25.2Volts. We can get twice the current of a single battery pack from 6S2P. Because one cell can only provide 20A at burst, So two in parallel will provide 40A.
Step 3: Assembling the battery pack
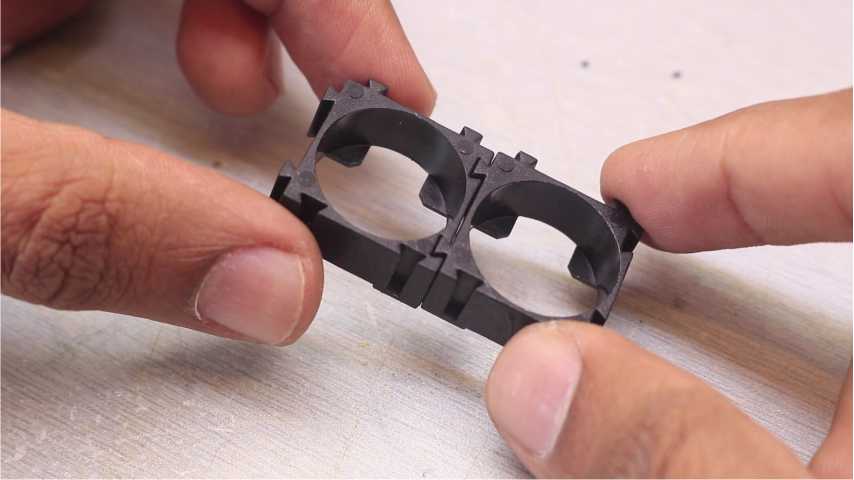

Before assembling the battery pack, make sure the voltage of all cells is the same. Then use tiny black spacers made specially for 18650 cells. Then add the cells in spacers in alternating pattern (Top of the first cell should be ‘+’ and top of the second cell should be ‘-‘). After this, cover the top with the same type of spacers. As a result, this will position the cells together.
Note: Before proceeding ahead make sure all the cells are at same voltage level!
Step 4: Connecting the cells in 6S1P configuration

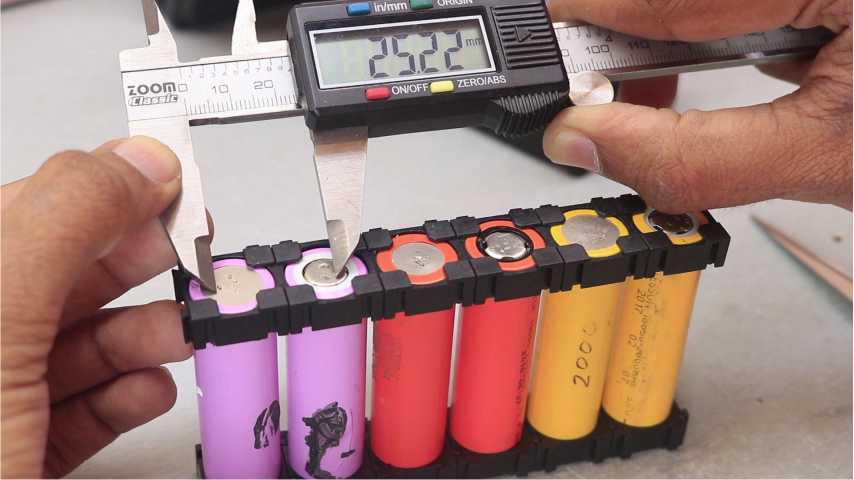

Measure the space between two cells (It comes to be 25 mm). Use a nickel strip measuring 10 mm by width and 0.15 mm thick. Cut 25 mm long pieces of the strip. Soldering the cells is not recommended. Soldering may heat up the cells and cause charge losses. Hence, preferred spot welding over soldering.If you want to built and DIY battery spot welder We have a Tutorial on that. First, place the Nickel strip over the cells and spot weld twice over each cell. It will attach the strip to the cells properly.
Step 5: Completion


We can add an XT-60 plug and finish with the battery pack. We can also add BMS circuit. It adds a couple of useful features like Overcharge protection, Over-discharge protection, & Balance to the charging. Stick the BMS on the batteries with hot glue. Solder the connection as shown on the board. If your BMS does not offer balance charging, you can add the terminal. And this battery pack will be complete.