Introduction
Raspberry Pi OS (formerly Raspbian) is a Debian-based operating system for Raspberry Pi. Mike Thompson and Peter Green created an independent Raspbian OS project. They completed the initial build in June 2012. Previous Pi OS have been 32-bit and based on Raspbian core, taking the name Raspbian. Since we don’t use recent 64-bit versions in the Raspbian core, they changed the name to Raspberry Pi OS. Raspberry Pi OS is highly optimized for the Raspberry Pi line’s of compact Single Board Computers with ARM CPUs. Raspberry Pi OS uses a modified LXDE as its desktop environment with the Openbox stacking window manager & a new theme and few other changes. The distribution is shipped with a copy of the algebra program Wolfram Mathematica.
Acquisition of components
- Raspberry Pi 4 Model B –https://www.banggood.in/custlink/Gv3m9Ngcyt
- 5V Type C adapter – https://www.banggood.in/custlink/33KDiA4Jh6
- Heatsink for Pi- https://www.banggood.in/custlink/DmvmILbqp7
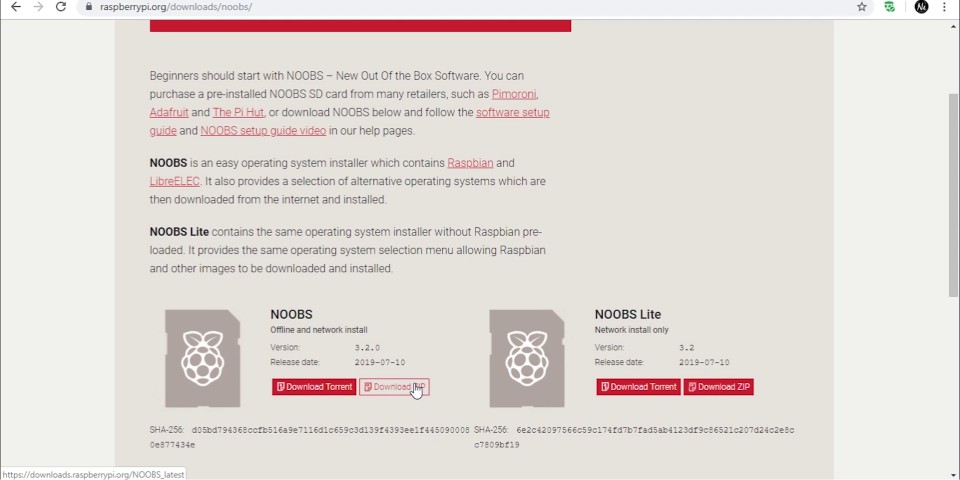
For installing the OS on the board, we need Raspberry Pi, Memory card (8 GB or higher) and a computer. We can achieve this by two methods.We will call First method as NOOBS (New Out Of the Box Software). For this, we need to go to raspberrypi.org and in the downloads section, click on NOOBS.
Then we need to download NOOBS and not the lite version since we want all the software pre-loaded.
First method
Loading the software on SD card
We need to begin with the SD card formatter after we have downloaded the zip file of NOOBS. After formatting the SD card, we should extract all the files in the SD card. After that, we can eject our SD card, and connect the Pi to keyboard, mouse, monitor and power. Once the screen appears, we select the Raspbian and then click on Install. Once installed, we need to select our language, time zone and reset our password. And that will show us the successful completion of installing the OS.
Second method
To go by second method, we need to go to https://raspberrypi.org and then click on downloads, followed by clicking on Raspbian. After that, we will download the first version of the software in which all the packages are pre-loaded. Then, we need to use two softwares, namely SD card formatter and balenaEtcher, after extracting the files on the desktop. After opening the etcher software, we need to flash the image, which will take about 15 min.
After flashing of the disc image is done, we only need to power the board and the software will be installed automatically. And this project will be successful.
You might also like this article on Raspberry:


