Introduction,
In this tutorial I’ll show, how you can install FTDI drivers in your windows PC. Because when you try to install drivers using windows automatic driver installer it doesn’t seem to work as expected. So lets see how to do it manually.
Firstly download the driver.
Extract the drivers

After downloading drivers, go into your download folders and unzip the driver files using Winrar or any other application.
Verify if FTDI is detected
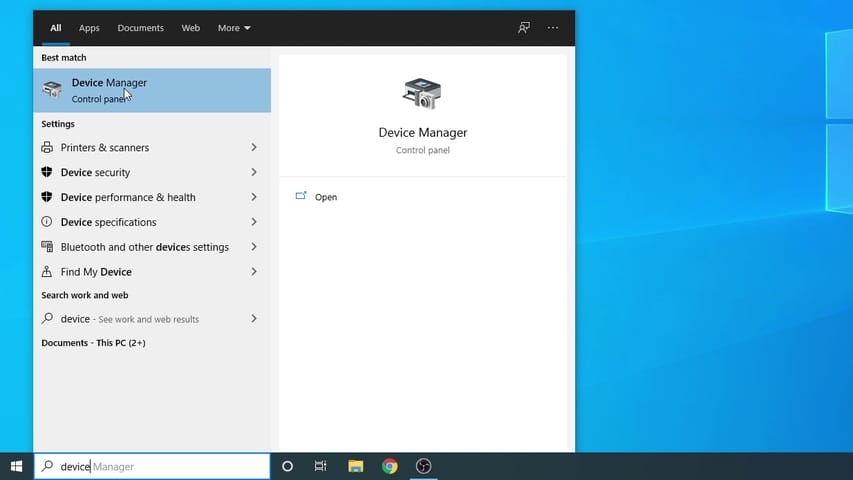
Now connect the FTDI to your computer, followed by opening the device manager, and under the Other devices tab, you should see it as FTDI 232R USB UART. If it shows up there correctly then follow the steps from “STEP 1”.
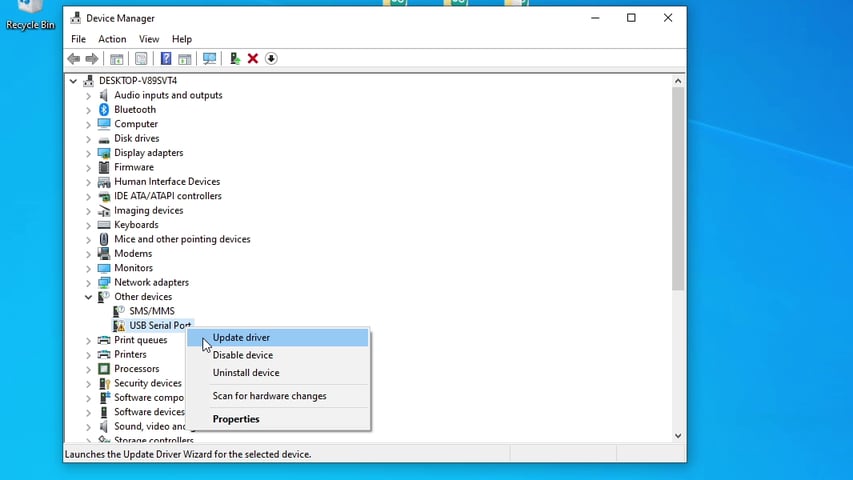
And if it shows up as USB Serial Port. In that case, follow the steps from “STEP 2”

Step 1: Installing First Set of FTDI drivers
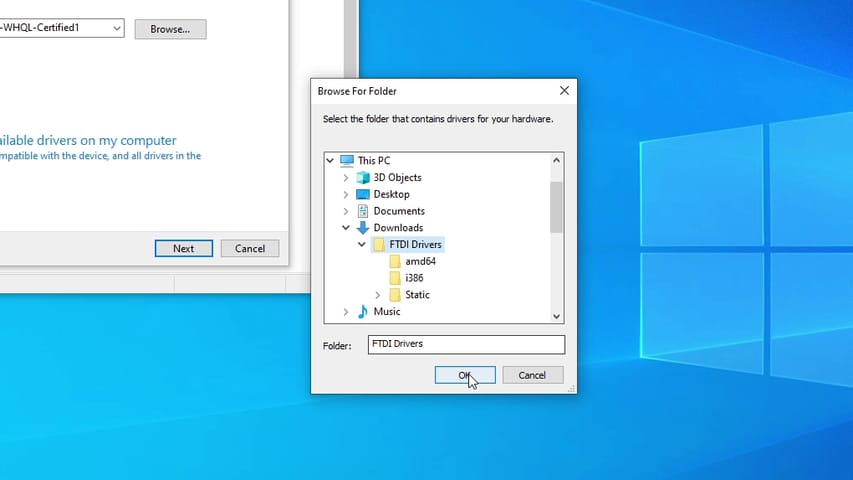
Firstly, Open the device manager, right-click on the FTDI and click on Update drivers. Then click on Browse My computer for drivers and then just select the main Folder where you have extracted the drivers. And then hit ok, make sure Include Subfolder is ticked. And now click on Next and it will install the first set of drivers.


Step 2: Installing the Second Set of FTDI drivers
Now disconnect your FTDI and reconnect again back to your computer. And this time it will show up as USB Serial Port under other devices. So now again right click on it and select update drivers. Then again click on Browse My computer for drivers. Now select the main Folder where you have extracted the drivers. And then hit ok, make sure Include Subfolder is ticked. And now click on Next and it will install the second set of drivers. Which is the same process as the first one.
If everything is done correctly, then the drivers will be installed and now you can use your FTDI without any problem.