Introduction,
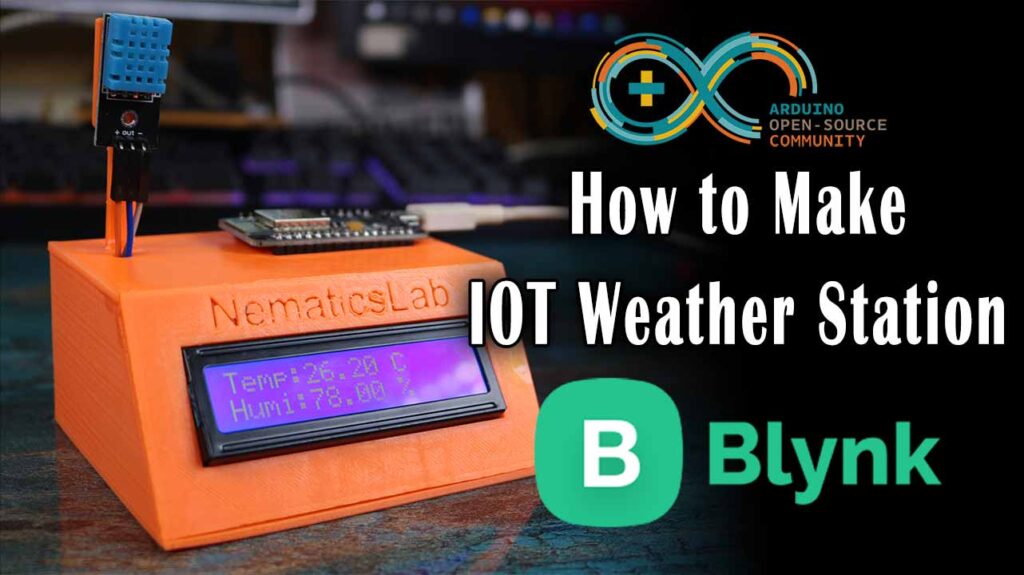
In this tutorial I’ll show you how you can make a simple IOT weather station using a NodeMCU and DHT11 Sensor so without any further ado Let’s get started!
Step 1: Everything we Need
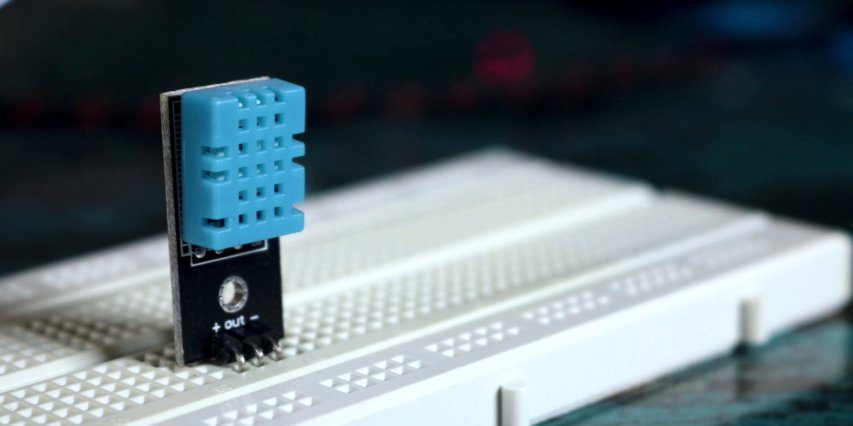
Let’s start with the everything we need for this IOT weather station! First of all, we need something to measure temperature and humidity for that perfect match is DHT11 sensor. You can even you an DHT22 it will work just fine just make sure to changes in the code accordingly.
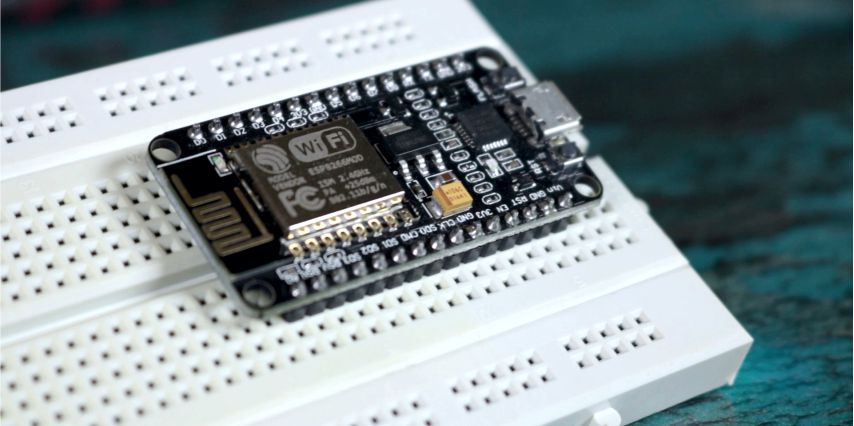

Next up we need is a microcontroller but we can’t use any regular microcontroller for like Arduino. So will use a NodeMCU which is based on ESP12E chip. Which has on board WIFI capability which is what we are looking for.
Lastly, we will use a 16 by 2 LCD with I2C interface for Displaying the weather status like temperature and humidity on it.
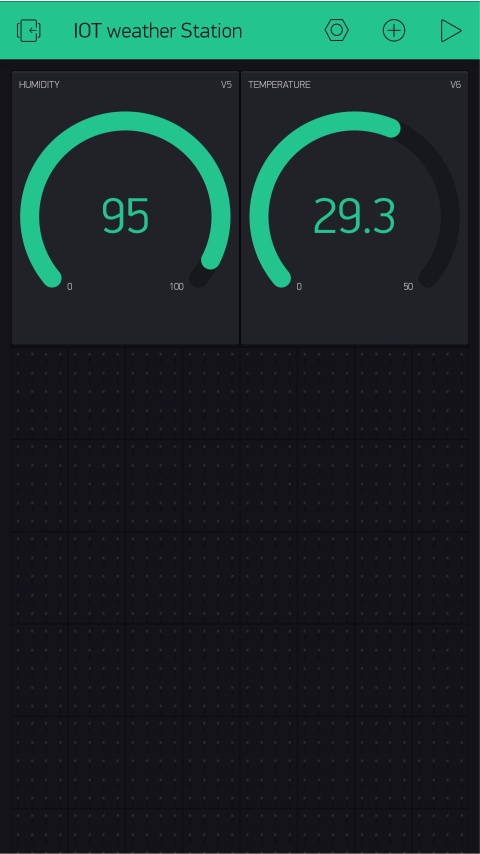
Now to make this project litter more interesting we will use Blynk application & its library to even display the status of weather on your smartphone.
Step 2: Code & Schematic

Now all we have to do is make the connections as per schematic. You can download schematic about this project & Code from below.
Step 3: Setting up blynk
Once all the connections are done you can upload the code to the NodeMCU but before that we need to setup blynk application.
So go to app store on your smartphone. Download and login using your email address.
- Now create a new project. After which you will see a pop up which says an authentication token, we sent to your email address. Which we will use later on during programming.
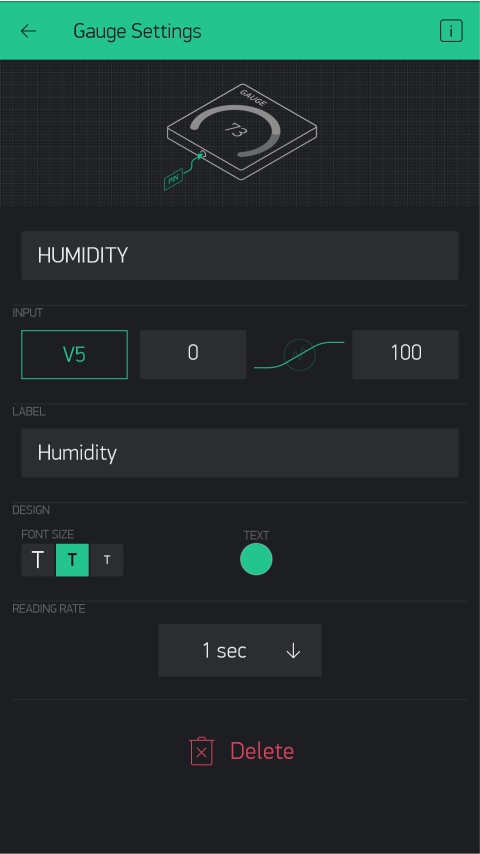
- Now select on this Plus Icon and add two of these gauges.
- Once you have added gauges, tap on it. Now Name it as Humidity and you can also change the label. Now select Input pin as virtual and pin number as V5.
- Make sure to set refresh rate as 1 Sec
Similarly repeat the process for other gauge but now for temperature and virtual Select pin as V6.
Step 4: Uploading Code
Once that is done now it time for programming. Open the code which you can download it from above. And changes the following lines.

- you will put your authentication token which you have received on your Email so just copy paste that.
- Now just Put your Wifi name in SSDI and Password of Your Wifi.
After which all we have to do is just upload the code and this project is complete well sort of.
Step 5: 3D Printing (Optional)
To make it look cool device I designed this case using Fusion 360 and 3D printed it. After which all I had to do was assemble it!
So that’s pretty much it for this video guys I hope you enjoyed this video if you did you can check Out this awesome Tutorial as well,
https://nematicslab.com/how-to-assign-static-ip-address-to-raspberry-pi/


