
Introduction,
Camera slider can be used for taking horizontally or vertically moving videos having high stability and very good focus. In this project, we will be seeing how to build a Camera slider despite having low budget.
Step 1: Hardware Required,
We need to have the aluminium extrusion bar of length 1m, width 40mm and height will be 20mm. We need to take note that gap between two channels of the bar is 20mm.
Step 2: Creating the supports for slider mechanism
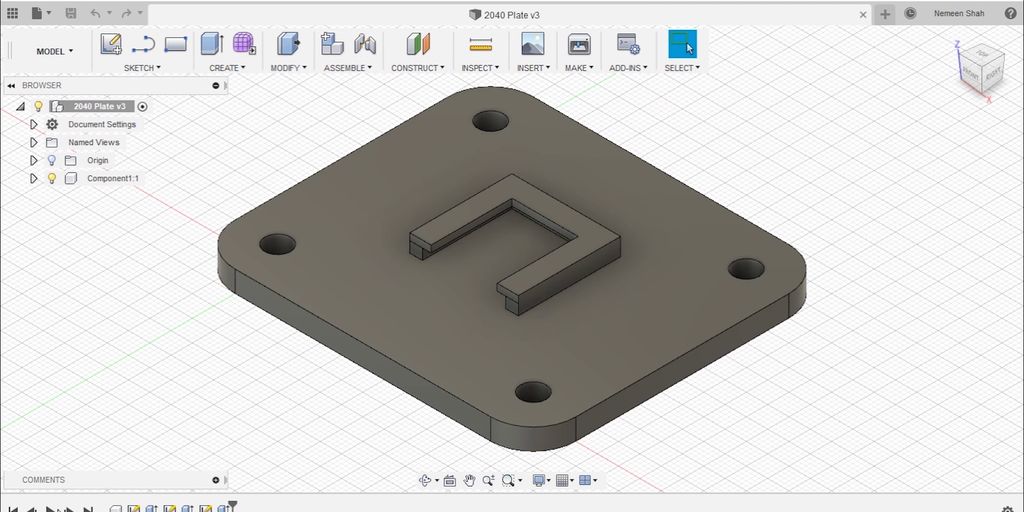

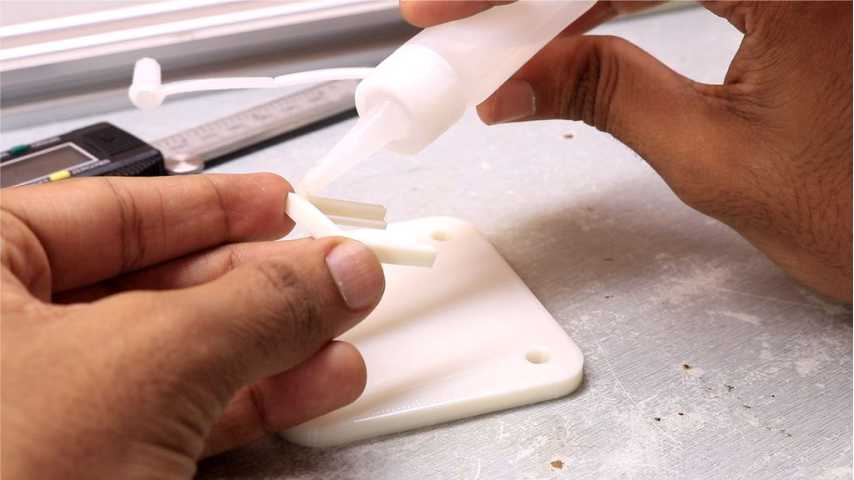

Using Fusion 360 we have, created one gantry plate with horseshoe mount. After exporting the ‘STL’ file. We sliced the 3D model and sent it to the 3D printer and printed it. If it is not possible to 3D print one, we can always cut it from MDF of acrylic sheets. Use super glue to attach two separately printed pieces of the mount.
Step 3: Attaching the slider to extrusion bar
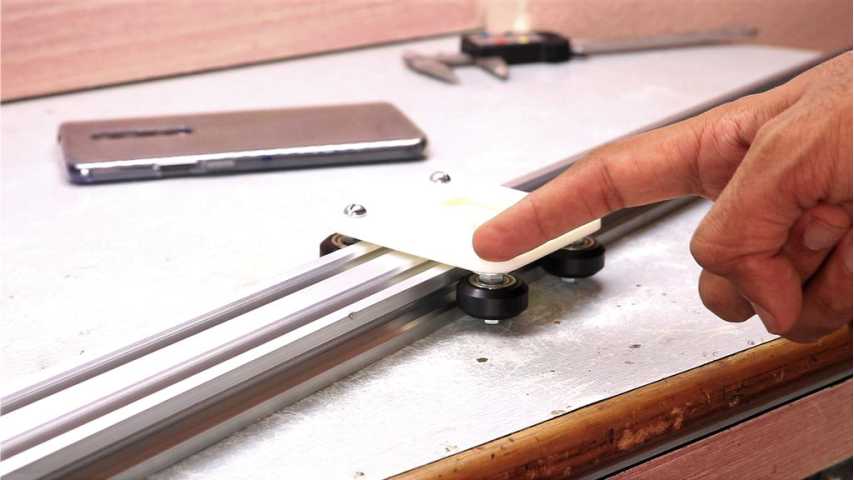


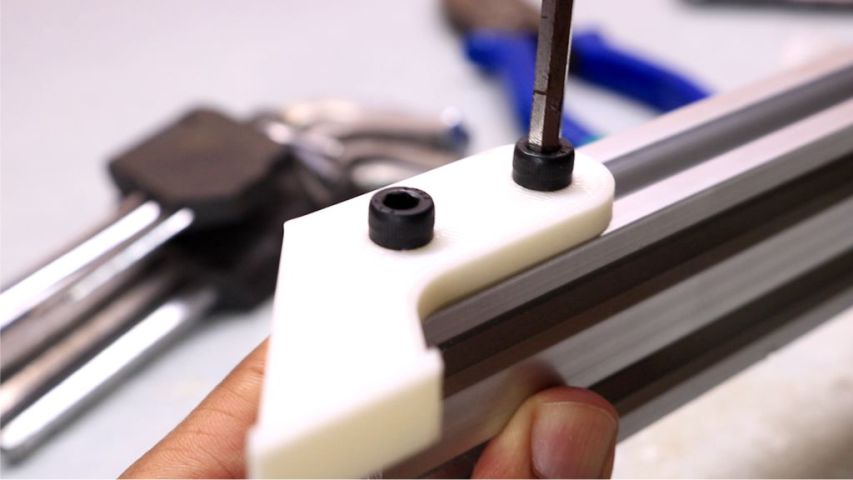
Attach the v-slot wheels (dia 24mm) and M5 bolts of 25mm length and washers to the board and complete the initial assembly. Similarly, repeat the procedure for all four wheels. If the plates feel tight, adjust the wheels by tightening or loosing the bolts. Mount the horseshoe head on the slider.
Step 4: Designing the legs

We can see that by designing only the slider, we cannot ensure that it won’t fall of the bar. Hence we need to design its four legs. By designing the legs on Fusion 360, we can either 3D print them or an cut from acrylic sheet.
Step 5: Assemble the legs and bar together


For assembling the legs and bar together, we need to use M5 10mm long bolts along with T-nuts, which are specifically designed to fit in the aluminium extrusion. Slide the nuts inside the bar and attach all four legs by using the M5 bolts.
Step 6: Attach the camera

To attach the camera, create another attachment and 3D print it, and attach using T-nuts and M5 bolts (length 10mm).
Note: Mounting the slider on single tripod does not ensure balance and camera can fall off easily. Hence, we need to attach the slider to two tripods by creating and 3D printing two individual attachments. And the project will be successful.


