Introduction
Nikola Tesla invented the Tesla Coil in 1891. We use these coils as high energy electrical transformers. We can use it to produce high-voltage, low-current, high-frequency alternating-current electricity. He used these circuits to conduct innovative experiments in electrical lighting, phosphorescence and X-ray generation. Along with high frequency AC phenomena, we can use Tesla coil for electrotherapy, and the transmission of electrical energy without wires. Tesla coil circuits were used commercially in sparkgap radio transmitters for wireless telegraphy. In this tutorial, we will see how to make a working Tesla coil and test its features.
Tesla coil kit
DIY Music Tesla Coil Module Kit – http://bit.ly/37b6Yd2
Schematic
Step 1: Understand the functioning of Tesla Coil

A Tesla coil is usually a transformer with few turns on primary coil. Secondary coil has more turns than the primary coil. We need to have 1-2 turns on the primary and around 320 turns on the secondary coil to step up the voltage. We see the sparks due to parasitic capacitance between the coil and the air.
Step 2: Understand the circuit diagram
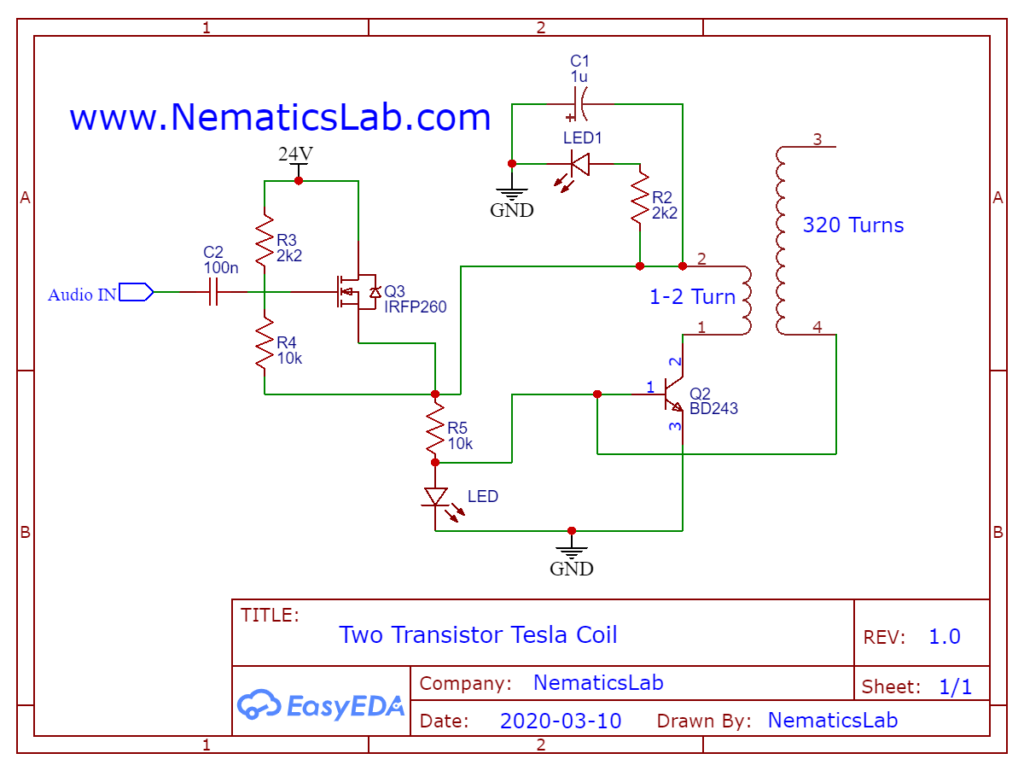
We can make a simple Tesla coil using the circuit called as slayer exciter circuit. When we apply voltage, the transistor turns ON and current flows through primary coil, which induces a current in secondary coil. The base of secondary coil is connected to base of the transistor. We can also see that when the current reaches threshold value, the transistor turns OFF for a short time. This cycle repeats over the resonance frequency of the circuit.
Step 3: Assembling the circuit
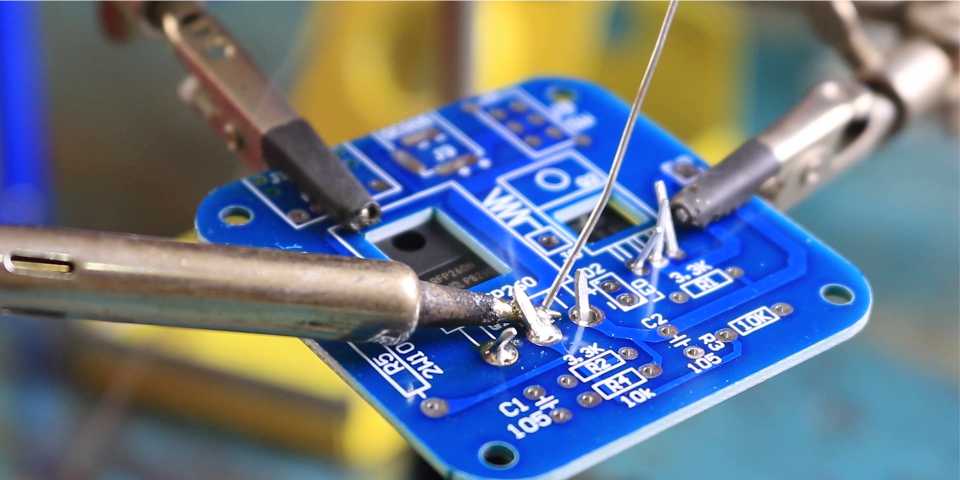


We have a similar circuit available to that of the slayer circuit. Also, we can use audio modulation in the circuit shown in the video. As a result, We can modulate the audio using 3.5mm jack. As well as control the voltage applied to the transistor. Then we can assemble the kit to test its functioning. We need to assemble the components in their right place as shown in the PCB.
Step 4: Test the circuit

After assembly, we need to check if the circuit works properly or not. We just need to bring the neon bulb or fluorescent light near the coil. We can observe the music from the sparks by seeing the length of a spark change with beats.